This assignment started out with a KWL(What we know, what we want to know, and then we followed up at the end of the lesson with what we learned.)
Then we watched a video clip from the Planet Earth series about Jungles. The students wrote down as many animals, birds, and plants as they could see while watching.
jungle video
(https://www.youtube.com/watch?v=koybucWX-4k)
jungle video
(https://www.youtube.com/watch?v=koybucWX-4k)
we also looked at a couple of artists that use non-traditional mediums to create sculptures.
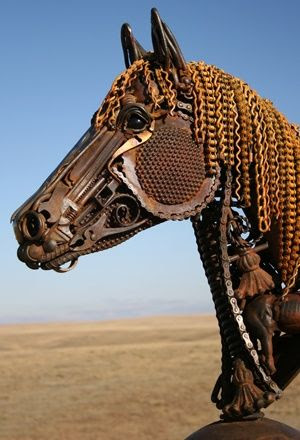
Ryan and Trevor Oakes


Materials available for student to included:
( we don't need all of these, just what ever you can find)
raffia
rope/ or string
green planters tape( floral tape)
burlap
green butcher paper
cardboard( i can probably find some from grocery stores)
(green) pipe cleaners
green plastic table covers-(2-3)
Ryan and Trevor Oakes
For this art lesson we got to work in groups to create our own vines.
These weren't just any ordinary vines,
each group got to pick 4 items to combine in their own creative way to create a jungle vine for Mrs. Latham's classroom and to possibly use in the school play, The Jungle Book.
Materials available for student to included:
( we don't need all of these, just what ever you can find)
raffia
rope/ or string
green planters tape( floral tape)
burlap
green butcher paper
cardboard( i can probably find some from grocery stores)
(green) pipe cleaners
green plastic table covers-(2-3)
plastic lays( i can check the dollar store too)
+ anything else you can think of or the kids bring in